
How to Read a Planting Plan
You worked with a garden designer, approved their design and they have delivered to you their planting plan. How do you make sense of this document?


Garden Designers create landscape plans for two reasons: firstly, illustrative plans are used to sell the design to their clients. Secondly, a more technical set of plans are used to inform the installation of the new landscape. The technical plans will typically include a planting plan, irrigation plan and installation details. More complex projects will include a title sheet, grading/drainage plan, construction plan, construction layout plan, a demolition plan and a lighting plan, with multiple sheets of construction details (e.g. lighting details, planting details, irrigation details, etc). Unless your project requires approval by your city, most residential garden designs just need a planting plan and an irrigation plan.
So, you have worked with a garden designer, you approved their design based on the illustrative plan and they have delivered to you their complete landscape plan package. If the designer is not going to be too involved in the installation, how do you make sense of the documents?
Before you start using the plans to install your new garden, you will need to check some details first. Plans are drawn to scale and are meant to be read from a printed layout - it is very hard to translate real life measurements by looking at the plan on a screen or in a smaller format than it was intended to be printed. So, the first check is to make sure the plans are printed correctly. If the plans were delivered as a hard-copy you should rest assured that this is the correct size. Unless the plans were drawn by hand, when given hard-copies ask for a PDF version too in case you need to make additional copies. In the USA and Canada, most landscape plans are designed for "ARCH D" paper format, which measures 24" x 36". This size is used for building plans and many printing stores have large scale printers to output this size fairly cheaply. If you are not sure what size the plan should be printed, the PDF should show the dimensions in the file properties.
Once the plan is printed, check the scale. A good plan should note the scale of the drawing in the title block, normally found on the right side of the sheet. It should also be displayed as a graphic scale in the plan itself. This graphic scale can be used to check if the drawing is printed properly to scale. This can be done by measuring with a ruler. For example, if the scale is written as 1/4" = 1'-0" then measuring the 1 ft increment from 0 in the scale should be 1/4".
If it does not match, then either the plan was printed at the wrong size, or there is a problem with the drawing. This can be verified by measuring elements on the plan that exist in real life. Take for example an existing driveway that stays unchanged as part of a design. For a 1/4" = 1' scale drawing, if the driveway is 12' wide (verified by measuring in person), it should measure as 3" wide in the printed plan. If this is not the case, then the plan cannot be used as is and you should resolve this directly with your designer. Even if the graphic scale shows no discrepancy, it is still worthwhile to do the second verification step . The way these plans are created in CAD software it is not hard to mistakenly have the plan be at the wrong scale from the graphic scale.
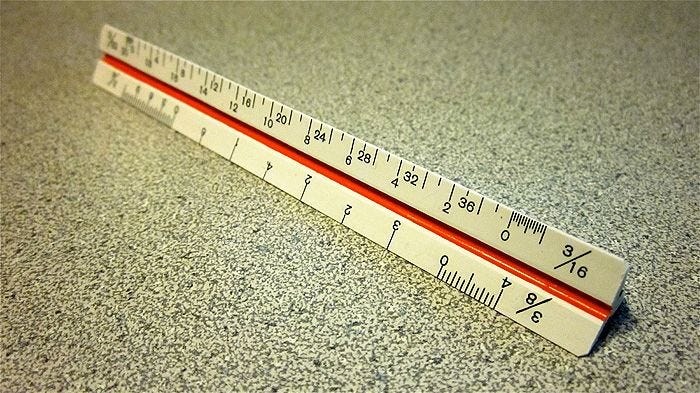
Architect Scales
Once you have established the plan is correctly to scale, you can start working from it. An architect scale will come in very handy for measuring from the plan and applying to a real-life space. Architect scales will show the actual real-life measurement and enable you to measure dimensions that are fractional to the scale. Using the a 1/4" scale example again, a measurement of 7/8" on your drawing will be hard to calculate to the real measurement of 10'-6". With an architect scale you can read that measurement instantly without having to do any calculations.
Applying Plan Measurements to the Real World
So now that you know how to read the plan, where do you start measuring from? Your plan should have some existing elements such as your house that will be untouched during installation. These will be used to start your measurements from. Using the following example, we can see how these can be used for your measurements to determine where to place plants. In the image below, the house is shown in gray, and there are several markers we can use here to measure from for the placement of the 3 plants highlighted.
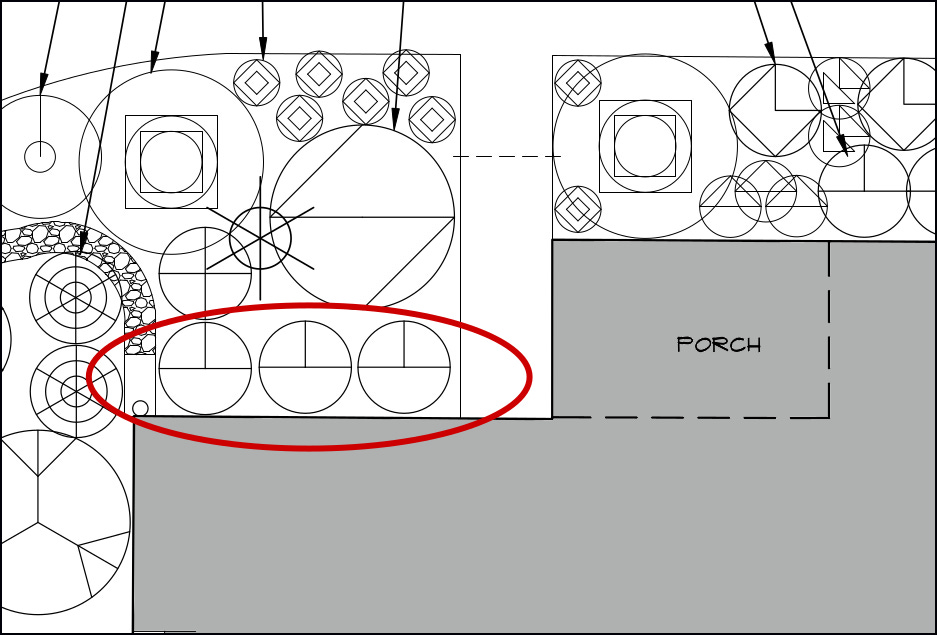
Because the house exists in the real world, the original site measurements would have been taken using a corner of this as a starting point. For the 3 plants, the closest fixed point is the corner of the walkway and the house.

We first measure the vertical measurement north from this corner to a position in-line with the center of the plant symbol. This measures at 20".
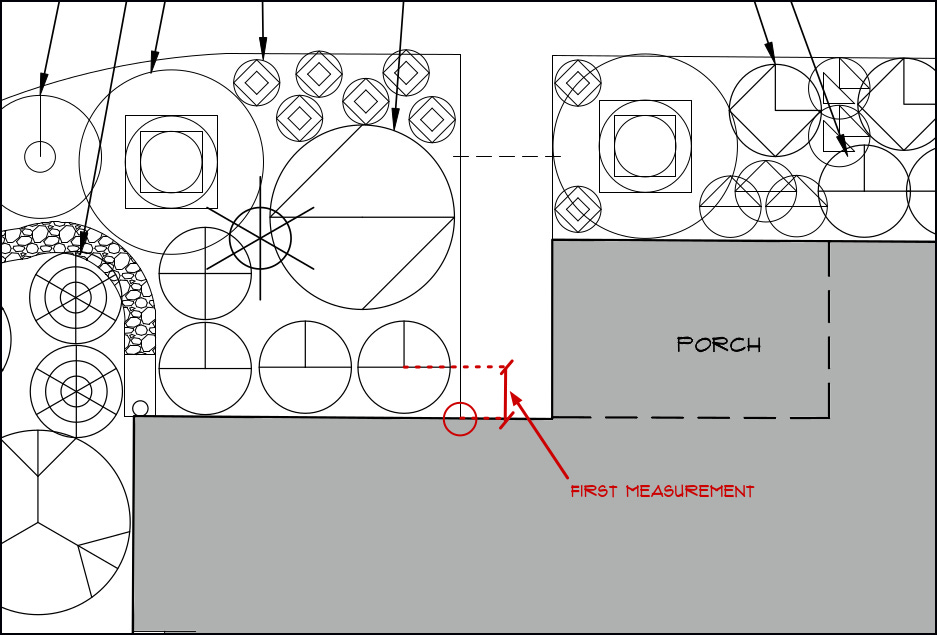
The second step is to measure horizontally from the corner to a position in-line with the center of the plant symbol. This measures at 22".

Taking these measurements we can now locate the first plant needs to be placed so that the center of the plant is 22" west of the walkway, 20" north of the external wall of the house. The way I would measure this on-site is to first measure the 22" horizontal line along the wall. then place a long piece of wood or a shovel handle at that point and measure the 20" vertical line along that item. This placement can be verified by verifying the spot is 22" away from the edge of the walkway.
Now that we know where the first plant is located, we can use this to measure from for other plants. These three shrubs are lined up in a straight line, evenly spaced from each other. Measuring from the center of the first symbol to the center of the second symbol, we can see that the shrubs should be spaced 39" apart.
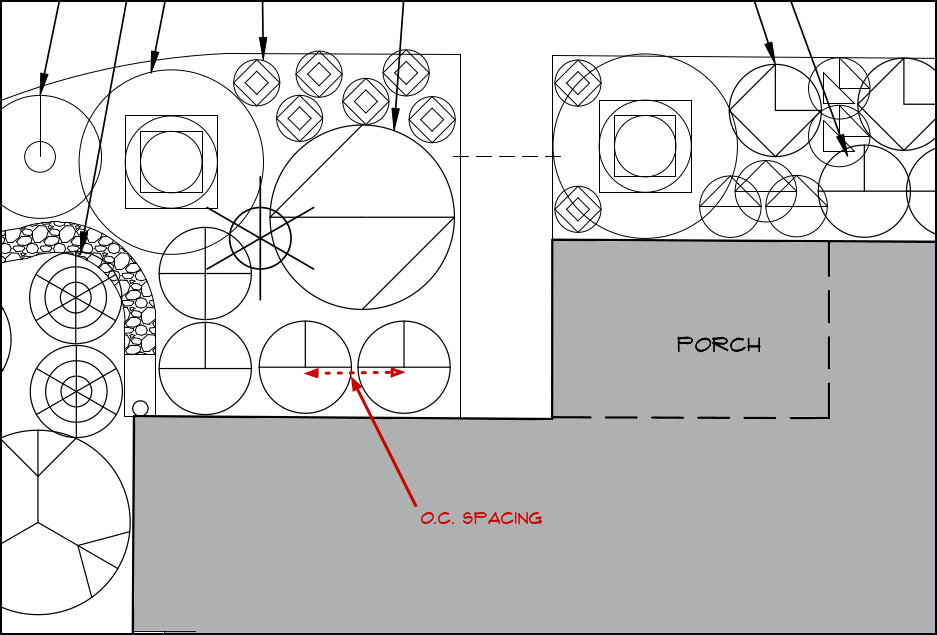
When several plants are planted in a row with equal spacing like this, this measurement is referred to as "O.C. Spacing". O.C. stands for "On Center" meaning that is the distance between plants when measured from their centers. For mass plantings of smaller plants, it can be difficult and time-consuming to measure each one out based on the plan so instead this is listed as a detail for the plant in the plant list on the planting plan. In these instances, you just need to fill the space occupied by the symbols or hatching and place plants so that they are spaced equally from each other with a spacing that is no less than the O.C. spacing specified.
When measuring off other plants, there is a greater chance for error, so you should sanity-check placements periodically by measuring to other fixed points in the plan. In the example above, one can check that the left-most plant of the 3 plants measures horizontally from the corner of the house the same as the plan.
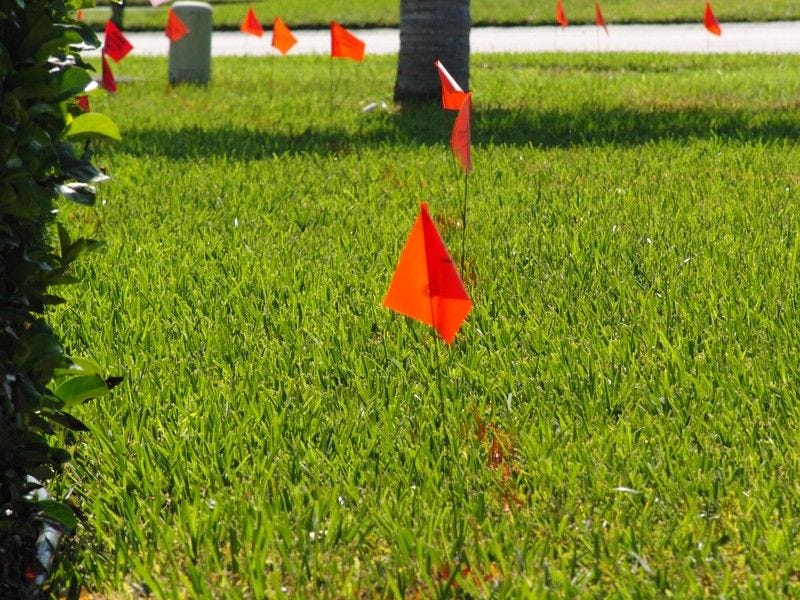
When starting a new planting, I usually mark out all the plants using landscape flags, which are similar to the flags used to mark utility lines. If there is a discrepancy between the plan and site conditions or a placement was wrongly measured, it is a lot easier to relocate a flag than a shrub buried in the ground. You could also place the plants in their pots in their positions, but these are more easily misplaced than flags pinned into the ground.
Making Changes to Plant Layout
As you start laying out the positions of your plants, you may think it doesn't look "full enough" and want to move plants closer together when they are planted. Bear in mind that skilled garden designers base the position of plants on their semi-mature size, not how they might look when they are first planted. This allows the plants to grow out without overcrowding each other. If you do make changes, pay attention to the size of the symbols in the planting plan as these should be the same width as is typical for that plant at maturity. If you move the position of the plant, measure out to make sure the new position has an area around it equal to size of the symbol in the plan. A better solution for making your newly installed garden look full is to use annual plants that will fill in the space until the plants grow to full size. In my own designs, I also specify wildflower seeds to be spread around the plants which will die off and return each year until the garden is fully grown.
Other Elements of a Planting Plan
A well-constructed planting plan should not just include the layout of the plants and a scale. Some other elements should be expected:
Ideally, it should include a legend of the plant symbols in a plant list detailing the names (both botanical and common), quantity, pot size and notes (e.g. o.c. spacing is specified here). This plant list makes it much easier for landscape contractors to give you accurate bids if you are looking for a 3rd party to do the planting for you.
Close to the scale, you should also see a "North" symbol, indicating which direction is north to help orient anyone working off the plans.
Another element you should expect to see is a title block. This is normally on the right-hand edge of the plan but is sometimes placed at the bottom. The title block should include contact information for the designer, address of the project site, revision date, scale, and the name of the sheet (e.g. "Planting plan - Front Yard"). Sometimes the north symbol is shown in the title block as well.
With this information, you should have the confidence to read and understand a planting plan. Even if you are not doing the work yourself, I recommend familiarizing yourself with the plan as contractors will not always pay close attention to the details. I recommend for any planting projects where you are using a third party installer that you have the placement of plants flagged out before they start work. Most garden designers will do this for an additional fee.
If you have any questions about this topic, please let us know in the comments below.