
Designing a Garden from Scratch - The Site Plan
The goal for any successful garden design is to have a scale drawing of the outdoor space you are planning. This is why having a scale drawing site plan is so important.

Designing a home garden can be a gratifying task, but all too often people find they don't know where to start. Today's post is the third in a new series where I will explain a simple process to follow for creating a garden design.
The Site Plan / Base Map
The goal for any successful garden design is to have a scale drawing of the outdoor space you are planning. Each shrub, tree, paving area, etc. will need to fit into the space you are planning. To ensure there are no surprises, you need to make sure you are working within the measured confines of your existing space. This is why having a scale drawing site plan (also known as a base map) is so important.
In the first 2 steps of this garden design process, it wasn't necessary to have a scale drawing site plan. For the analysis and concept plans, exact measurements were not needed. As a professional designer, I always start my projects by creating my site plan, but it is perfectly fine if you don't have it ready until you are done with your concepts. I do it because it helps me become familiar with, and remember the space better while doing my analysis and concepts. However, if you are living at the same location, you are already familiar with the space so this is less important.
At this point in the design process, you are ready to start thinking about what exactly to fill in the areas of your outdoor space, so this is the time when the site plan needs to be dialed in. Not doing so will cause you a lot of errors that could cost you money by purchasing too much material, or create empty spaces that you struggle to fill as you panic to finish your garden.
Measurement Data
To create your site plan, you need measurement data. Generally speaking, there are 3 options for getting the data for your site plan: using an existing construction plan for your property, basing it off public data, or measuring it by hand. You should consider each option in the order I listed as they are listed from easy (existing plan) to most difficult (hand measuring).
Existing Plan
In your site analysis we talked about creating a site plan, and one option was to use existing construction plans that you might have already. If this was how you did it, then you already have your measurement data, you can stop reading this section and skip to Site Plan Medium.
Using Public Data
Depending on where you live, you may be able to find property layouts online, that can be measured from directly. Here are some ways to do that:
GIS data
Many local governments have GIS (geographic information system) databases that are available for public use. GIS websites are maps that show important information about an area, including building footprints and property boundaries. Some of these maps will also show trees, contour lines, and other information that may be useful.
For example, I have worked on many projects in Los Angeles, where the city has published GIS data on the ZIMAS website. Using this site, I can search by address to view an outline of the property boundaries and footprint of the buildings on site. Using the measuring tool, I can get measurements of these areas to create my site plan.
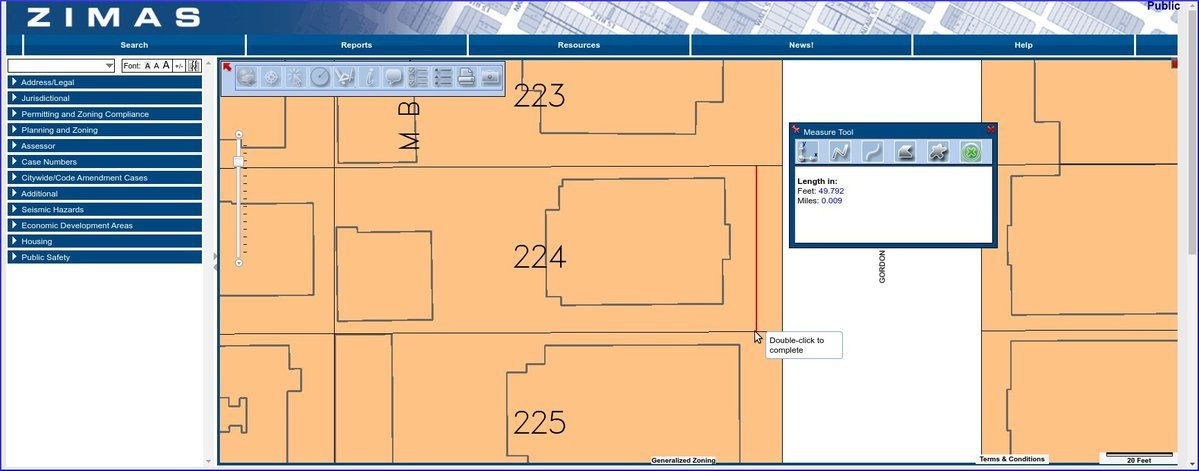
If any ground features are to remain in the newly designed garden, I can also measure from aerial imagery on the same site.
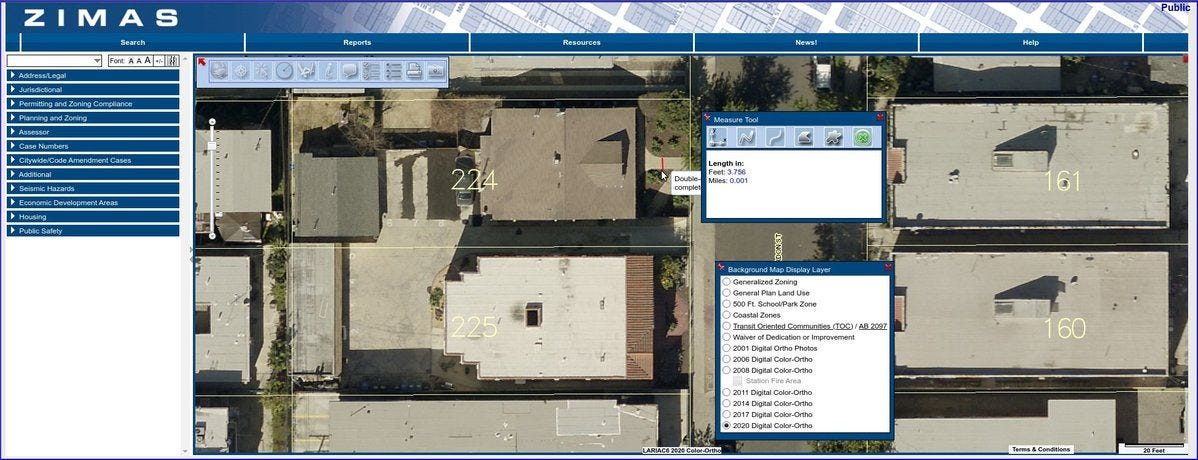
As you can see, it is fairly easy to use a resource like ZIMAS to get your measurements. If you are designing someone else's garden, it makes it easy for you to create a site plan remotely. As these data sources are specific to your local government's choice of information systems, you may need to do some googling to find one that shows data for your area. Unfortunately, some local authorities do not make their GIS data publicly accessible for free.
Bing Maps
Bing Maps is another resource that can be used, as it has a measuring tool that can be used in a similar way to the ZIMAS example. While this is also available in Google Earth, the Bing version is slightly more useful as it allows you to measure in any view. Google Earth only allows measurements using aerial views, which can be misleading as aerial views are typically taken at a slight angle, not always directly above the buildings.
The problem with using Bing Maps or Google Earth is that your property lines are not shown, so unless you have fences or walls that can be easily seen on aerial views, it may not give you all the information you need.
Note that if your home has any alterations that were done without permits, or the work was completed recently, public maps may not be accurate. You will have to make adjustments for these areas of your site or measure everything by hand.
Measuring by Hand
The most accurate way to get measurements of your garden and the building inside/around it is to measure by hand. However, this is a lot more time-consuming than the above methods.
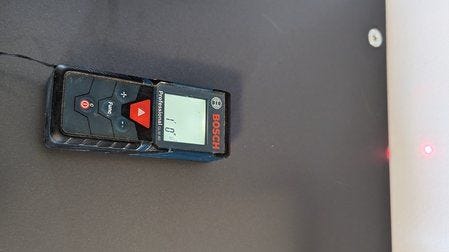
When measuring by hand, you will get the job done much more quickly if you use the right tool. Laser-pointing measuring devices can save a lot of time over measuring tape. When using a laser measure, it can be hard to use when it is very sunny so it is better to use it on overcast days or when the sun is lower in the sky.
Use the same plan you used for your site analysis to keep notes of your measurements. This can be useful as a sanity check to make sure you are not making mistakes. For example, if your property sits in a rectangular lot - you should expect your house to measure no wider than the distance between your fences on either side of the garden. Another check I often do when measuring by hand is to measure objects from multiple known locations. For example, if you measured the location of a tree by measuring it from the back of your house, take a measurement from your back fence and check if these two measurements are the same as a parallel measurement from the back fence to the house (see example below).
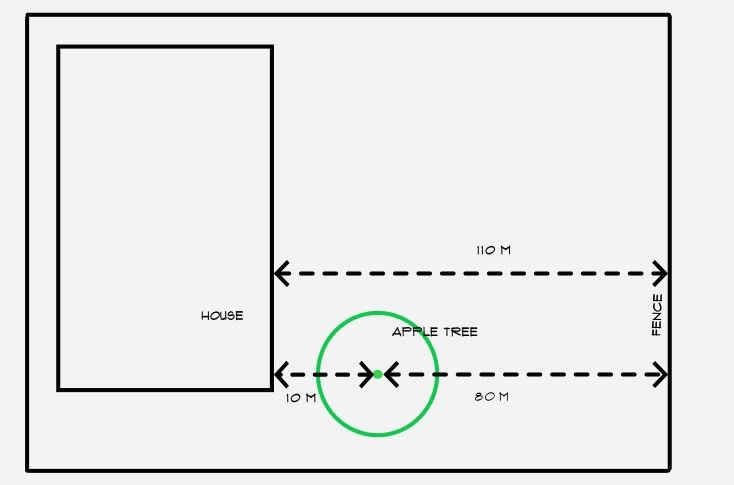
In this example, the combined distance from the house to the tree and the tree to the fence is 20m shorter than the measurement noted for the distance from the house to the fence. Clearly, there is a discrepancy, so all three measurements should be double-checked. Try to double-check measurements as much as possible when creating your site plan.
Scale not needed yet
When taking measurements, do not worry about creating a scale drawing, just note the measurements. Creating a scale drawing is the next step.
Site Plan Medium
Now that you have your measurements complete, it is time to create a scale drawing of your site plan. How you approach this step is dependent on the medium you wish to use for creating your site plan.
Computer Aided Design (CAD)
CAD software allows you to create a site plan on a 1:1 scale. After completing your final design, this file can then be scaled down to print for use during the installation of your new garden, or for sharing with landscapers to get bids. There are general-purpose CAD apps that can be used such as AutoCAD or BricsCAD, but they are expensive to purchase and have a steep learning curve. I use BricsCAD myself, but I would only recommend it if you are going to use it for multiple projects. If you are going to pursue a career or side hustle as a garden designer, I recommend purchasing a CAD app and getting some training on how to use the tool as it can really streamline your process over time as you master the software.
Garden Design CAD Software
In addition to general-purpose CAD software, there are specialized versions with a limited feature set purely for home interior and landscape design. I don't have any experience with these as I had to learn AutoCAD when I trained as a landscape architect. While I can't make any recommendations, I have heard good things about TurboCAD's FloorPlan Home & Landscape Pro and GardenCAD.
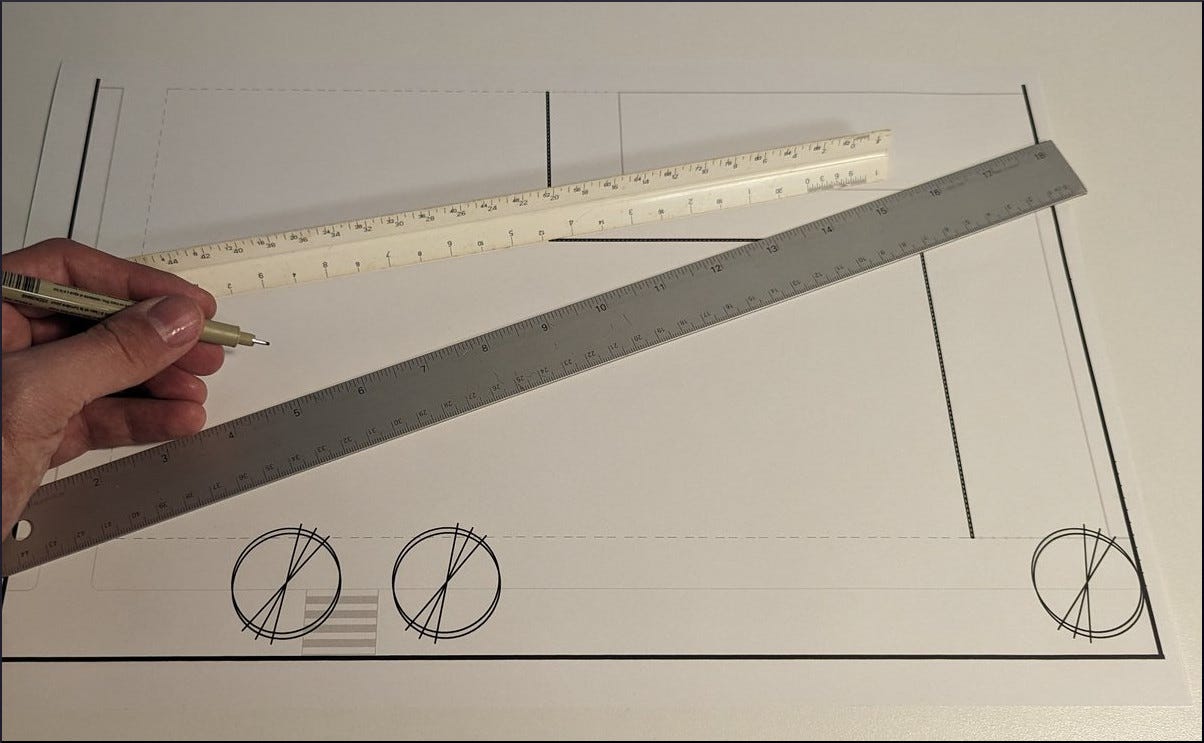
Creating Site Plan on Paper
You may not want to create your site plan on the computer. That is fine. Garden designers spent hundreds of years plotting their plans directly by hand before the advent of CAD software, and some contemporary designers still do so.
The simplest way to do this is by using graph paper so that you can use the squares on the graph as units of measurement. You will also need to select the size of paper you are going to work on and ensure that it fits on your page. This will be determined by your choice of scale. For garden plans, the typical paper sizes are 11x17" or 24x36" in North America, and A3, A2, or A1 for other countries. A1 is used less often in Europe, where gardens tend to be smaller than in the New World, but it may be necessary for gardens in Australia or New Zealand.
Scale
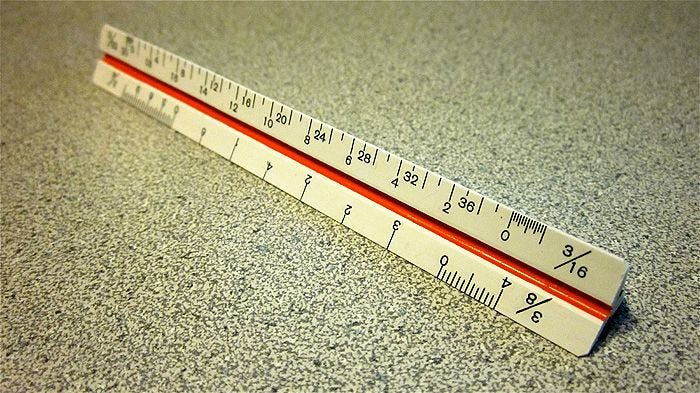
The scale you use will determine the size of the paper you will be working on. It is important that you choose from one of the standard architectural scales. When your design is installed from the plan, it will be measured using an architect's scale rule, which only uses these standard scales.
In the U.S. and Canada, you will use imperial measurements, and almost all other countries will use metric. Regardless of which system you are most familiar with, you must follow this convention because your materials will be sold only in imperial or metric sizes.
The following lists show the standard scales, as found on scale rules. You will need to determine which scale allows you to use most of the paper you are working on. For example, a site plan for a garden that measures 50' x 25' will comfortably fit on a 24x36" sheet at a scale of 1⁄2″=1′-0″. You will need to leave space for notes and a legend on your final design, so make sure the dimensions of your site do not take up more than 75% of the total paper space.
Architectural scales - metric
1:500– Pronounced one to five hundred
1:200
1:100
1:50
1:20
1:10
1:5
1:2
Architectural scales - imperial
1″=1′-0″– Pronounced one inch to a foot
3⁄4″=1′-0″
1⁄2″=1′-0″
3⁄8″=1′-0″
1⁄4″=1′-0″
3⁄16″=1′-0″
1⁄8″=1′-0″
3⁄32″=1′0″
After you decide which scale to use, make sure you note it somewhere on the plan, so that you can remember later. This is especially helpful if others will be working with you on the design and installation.
When using CAD software, you don't need to worry about the scale until you have created the site plan on your chosen app. This helps streamline the process when doing all your designs digitally.
Once you have determined your medium and paper size, the site plan is now complete and you are ready to move on to the technical design. Although this is the third in the Garden Design Process Series, you can create your site plan before the analysis or concept plans but it is not absolutely necessary. It is crucial to have it completed before you move on to the technical design.